Welcome - Explore my Blog

I've been keeping this blog for all of my beekeeping years and I am beginning my 19th year of beekeeping in April 2024. Now there are more than 1300 posts on this blog. Please use the search bar below to search the blog for other posts on a subject in which you are interested. You can also click on the "label" at the end of a post and all posts with that label will show up. At the very bottom of this page is a list of all the labels I've used.

Even if you find one post on the subject, I've posted a lot on basic beekeeping skills like installing bees, harvesting honey, inspecting the hive, etc. so be sure to search for more once you've found a topic of interest to you. And watch the useful videos and slide shows on the sidebar. All of them have captions. Please share posts of interest via Facebook, Pinterest, etc.

I began this blog to chronicle my beekeeping experiences. I have read lots of beekeeping books, but nothing takes the place of either hands-on experience with an experienced beekeeper or good pictures of the process. I want people to have a clearer picture of what to expect in their beekeeping so I post pictures and write about my beekeeping saga here.Master Beekeeper Enjoy with me as I learn and grow as a beekeeper.

Need help with an Atlanta area swarm? Visit Found a Swarm? Call a Beekeeper. ‪(404) 482-1848‬

Want to Pin this post?

Sunday, August 06, 2017

SPARK Elementary Phase 2

This week I returned by myself to move the second hive onto cinder blocks and to give it more ventilation. I also moved the hive about one foot from where it was and turned it to give us more room to work on the hive. Before it was jammed in a corner with no work room.


Now we all know you don't move bees in the day time, but this hive is at a school on its rooftop and I only have access during school hours, so there was no choice but to move the hive in the daylight. I was worried the bees would get lost, but also fairly hopeful that all would work out.

Since I was by myself, I needed to move one box at a time. The top cover, inner cover were easy but the top box presented a challenge. The previous beekeeper had pulled one frame, probably last year, to taste the honey and had simply left the space. Bees who detest open space in a hive, hurried to fill the space with comb and honey.


I knew I would have to be very careful as I removed this box. I lifted it straight up into the air, leaving the comb behind standing on the queen excluder.


I lifted box two, queen excluder, honey comb and all at once! Then I covered it as I do all open boxes with a hive drape. In the photo below, I have already moved the bottom box and then set the second box, comb, excluder, and all on top of it.

The bottom box, having sat on the ground for all of this time, is rotting and the seams are splitting. But I didn't have a box to replace it and decided to take care of that in the spring. I don't want to disturb the bees too much this late in the season.

Next I had to move the honey box into place without destroying the upstanding lone comb. This required more dexterity than I am usually afforded, but I was slow and careful and got the job done without breaking comb - well, one tiny break. I pulled the hive drape back as I lifted the box so I could be very careful in replacing the box.

I put the rest of the hive back together - the inner cover and the top cover. Again, I had replaced the rotting bottom board with a screened bottom and a slatted rack. I leaned the bottom board over the entrance to allow the bees on the bottom board a way to climb onto the new hive. You can see the rot. I left the right side open because that was nearest to where the hive had been and I hoped they could smell the queen's pheromone better that way.

"Mama's over here....."

I was a bit worried about the large number of bees flying in the old hive location so I sat down and played on my phone for a while to see if they would find home. I could tell before I left that moving the hive wasn't going to cause too much confusion.


In the right of the above photo next to the school window, you can see what the hive was sitting on - I don't know what that stuff is - the end of a drain pipe and some other odd plastic device.

I opened the "observation hive" nuc that is there and it was filled with roaches and no bees. It makes sense. With both sides uncovered glass, it would have been way too hot and too light for bees in that box. I believe this was the observation hive's first year. 

I'll see if Jeff and I can rig up a wood covering for each side. Then we can make a split from hive #1 at Spark next spring and start the observation hive up again. It would make a good teaching tool for the kids, but with the unprotected sides, it will be challenging to figure out a way to protect the bees from heat and sun.


Saturday, July 29, 2017

Assuming an Apiary - Bees at SPARK Elementary School

When I give talks about bees, I always begin by saying that if you ask ten beekeepers a question, you'll get at least twelve answers. Beekeeping is as much an art as it is a science, and so there are many ways to keep them.

I was asked to become the beekeeper at SPARK Elementary school - the school where my oldest grandkids have been students. So absolutely I wanted to do it. They have had bees for about three years at SPARK - and the beekeeper was an interested volunteer - not a parent or a grandparent. He just wanted to do it. But he was leaving for Army training and needed to give up his bees there.

I knew there would be differences in how we kept bees, and I agreed to meet him and the PTA president at the school in late May to get introduced to the bees there. He had two hives and a homemade observation hive. The school hives are on the rooftop of the building. It's extremely hot up there - in the 90s at least every summer day. And the sun beats down onto the hives.

Here's how they looked:

Hive #1:

Hive #2:
Note: this is from my second trip - on my first trip the hive had four boxes on it. It also had four foot tall weeds directly in front of it and a mountainous fire ant hive diagonally in front of it. The PTA worked hard between my visits to take care of the weeds and fire ants.

Hive #3:
This is a homemade "observation hive." In reality, this is a nuc hive with two deep boxes. On each side of the nuc is glass and there is no cover for the hive.


I keep my bees up off of the ground on cinder blocks, so I didn't say anything critical to him, but I knew that if I were going to be in charge of the hives, one of the first things I would do is raise the hives. They also are on solid bottom boards. 

So I went back on my own and really looked at everything. If you go back and look at Hive #1, I'd be interested in what you observe. SPOILER ALERT: I'm going to put some space in here so as not to reveal anything until you scroll back up to see what you see.


There are three things of note in Hive #1:
1. The bees are obviously in need of ventilation because they are spilled out in a dinner plate sized circle which would have been a beard if they were not on the ground.
2. The top box is coming apart, so the bees are guarding the large opening just under the top cover.
3. The top box has NO handles or cut-ins or grips of any kind to lift it.
HORRORS! 
Note also that I use only 8 frame mediums and these hives are in 10 frame deeps and shallows.

So I went alone on my second trip and realized all of the above. I couldn't get the top box which was full of honey off of the hive. All I was able to do on the second trip was to put beer caps under the top cover to give the hive a little ventilation. I also took a completely empty top box off of Hive #2 and put it on Hive #1 to give them some more circulation.

I also noticed that probably in response to my gasping comment about the observation hive: "They don't have any cover?" that the former beekeeper had draped a beach towel over the hive.

So on visit three I took Jeff, my son-in-law and strong beekeeper, the MABA hive lifter, a screened bottom board, a slatted rack, and a ten frame medium (the only one I own) which, of course, does have hand grips.

This is how the bees looked when we arrived. You can see the extra box I added and can see that it really helped with ventilation since now, although there is still a beard, the bees are not spilled all over the ground. You can see the handle-less box is splitting at each corner.

Jeff lit the smoker. You can see the extensive rooftop garden behind him.

We took the empty box off of the top and covered the exposed second box with a hive drape. We set up the metal hive lifter (on ground surrounding the hive) and moved the hive to one side. You can see the empty dirt where the hive was sitting.


Roaches were enjoying life under the hive.
 We set up the cinder blocks and put the screened bottom board (in photo) and the slatted rack (not in photo) on the cinder blocks.


We returned the old hive to its elevated position. Now to deal with the falling apart hive box.

We removed the hive frames one at a time to the yellow box I had brought. They were all filled with honey - which is great for the bees. And the box was equipped with spacers which spaced the frames so we didn't have to pry up propolis. I've never worked with a box with these spacers and it was a pleasure. I wanted to find a photo of one to show you, but the commercial companies don't appear to carry them any more. You can see the spacer (I thought it was called a rabbet) on the end of the hive box in the photo below if you click on it to enlarge it.

Actually I finally found these on Pigeon Mountain Trading Company. They are frame spacers and turn a 10 frame hive into a 9 frame one by spacing out the frames, allowing the bees to make thicker combs. 


 The former beekeeper had queen excluders on both of the full-sized hives and since the bees are used to that, I left them for now. Next year, I may remove them.


Then we put the yellow 10 frame box on top of the hive and returned the empty third box to the hive.
We walked away from the hive and suddenly I realized that the leaning board was the former bottom board. The bees were not moving into the hive - what if the queen were there? I didn't photograph, but did lean the bottom board against the hive so the nurse bees could walk in, but not before checking well to assure myself that the queen was not outside.

The next day I returned to remove the rotten bottom board and falling apart top box and the bees looked as happy as bees can look.
We'll return next week to put Hive #2 on cinder blocks with a screened bottom board and a slatted rack (if I have 10 frame stuff in my basement). And I'll put an oil cloth cover over the observation hive. There are bees in that hive but none on the outside frames which are totally exposed to light every single day.

Tuesday, May 16, 2017

My Own Private Pesticide Protest

Honey bees and other pollinators are all in danger from the pesticides that are currently being sprayed to kill the mosquito in the panic over zika. Pesticide operators apply the poison without discretion, often not paying attention to the instructions for its application.

In addition, they spray indiscriminately in the daytime when all of the pollinators are flying, despite the fact that pollinator organizations have spoken out about the need to spray after dark. After all, they would have to pay their workers overtime to do so. And the definition of after dark in the summer is typically after 9 PM - can you imagine them actually following that directive? Does the photo below look safe to you?


Please try alternative methods.


I have my own private pesticide protest. I walk my dog two to three miles a day through our Virginia Highlands neighborhood. At least ten beekeepers live in my area within a couple of blocks of me. Every time I see one of the signs indicating that mosquito spray has been used in the yard, I pull the sign out of the ground and lay it on its side on the grass so people won't see it as they go by. On Mondays (which is trash collection day), I put the signs in the curbside garbage containers.


Sunday, May 14, 2017

Spiderman is Scared of Bees

Last summer I got an unexpected call.

"This is the location director for the new Spiderman movie and we need the help of a beekeeper. We are shooting some scenes for Spiderman in Piedmont Park and we need someone to keep the bees in the beehives over there!"

I said, "Well, I can't do that. I can't make the bees stay in the hive and besides I don't have access to the bee hives in Piedmont Park."

He said, "We can't get in touch with the park's beekeeper. We'll pay you $20 to do this."

I laughed and told him that didn't begin to be enough money and besides, I couldn't make the bees stay in the beehive. He quickly raised it up to a lot of money and said he would pay me a minimum of four hours work a night for two nights. His biggest concern was that no one get stung - not Spiderman nor any of the many, many people working on the set. I said OK (if you get to a certain amount, I'll say yes to most anything!) and immediately called beekeeping buddies to get advice.

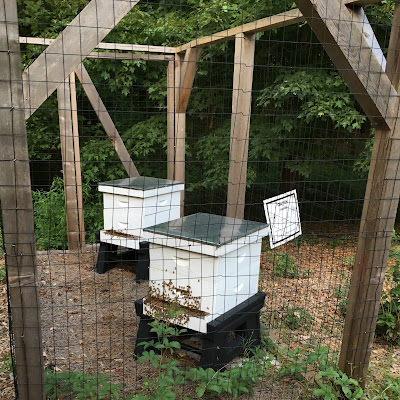
Piedmont Park is Atlanta's equivalent of Central Park. Many people daily walk right past these beehives so they are enclosed in a screened room with a locked door and open top. Here's how the beehives at Piedmont Park look:


I couldn't go inside the locked enclosure and simply cover the hives or block their entry for the night. And it's hot in July so many were bearding on the outside in the evenings. After getting good advice (mostly from Julia), I decided that what I should do is to cover the entire enclosure with wet sheets as one might cover just a single hive during a robbery. I gathered every sheet I had that wasn't on a bed (nine of them), put them in a bag and headed for the park. 

The movie was being shot at night, but because they were making the area brightly lit with huge spotlights, the bees were likely to continue flying if only to fly toward the lights. 

I got lots of help from many people (takes a ton of people to shoot a scene in Spiderman). We wet the sheets in a wheelbarrow.

Lots of equipment was assembled around the beehives. I couldn't believe how many people and items were needed to film Spiderman.


A water truck was nearby because they were planning to blow up a car near the beehives. This explosion was the main reason they were worried about the bees. This nice young man filled the wheelbarrow with water for me and pushed it to the beehives.

 Then he and I climbed up this ladder and draped the hive enclosure with the wet sheets.


As we finished, it was really dark. The bees stayed safely inside the enclosure and the filming began. All of this took me about 15 minutes to carry the equipment from my car to the hives and about 30 minutes to cover the enclosure. Then I could sit and watch all of the process involved in filming. 

Around 9 PM, they were ready to blow up the car, a mere 20 feet from the hives. The movie workers came over to me by the hives and requested that I move about 100 feet away to avoid being harmed by the explosion. 

I went over and sat with other movie workers on golf carts while the filming was going on. Although I had been warned, when the car blew up, I must have jumped a foot into the air!

When I left at 10 PM, there was still lots of filming planned for the remainder of the night. I went home and returned very early the next morning to remove the sheets. In that process, I did get one sting from a bee who was tangled in the folds of the sheet and felt irritated by my interference to rescue her.

So Spiderman was filmed in Atlanta's Piedmont Park with no bee stings to Spidey or his supporters. The only single sting was mine the next day.

If you see the movie, when the car blows up, think of me!


Best Part of a Mother's Day Bee Inspection!

My two-year-old grandson wanted to try on a bee hat and help his daddy and grandma with the bees:


Parker: the future of beekeeping!


Monday, May 08, 2017

Nevertheless, She Persisted!

The other day I looked out of my window and saw this on the front of a hive:


This looks like maybe 1 1/2 cups of bees - tiny swarm. It's probably a secondary swarm with a virgin queen. So I decided that I would try to capture them and brushed them into my swarm box, topping them with a ventilated hive top. But many of them flew right back to the hive front. 

I brushed again and this time, the bees started signaling that the queen was in the swarm box.

I held the swarm box up to the side of the hive and the bees systematically moved into the box.


So I carried this teacup swarm over to a waiting hive box and shook them in. In minutes the queen had led them all back to the swarm box. So now, I turned the swarm box upside down over the open topped hive box. I didn't take a photo, but the bees found their way out of the box and many flew back to the hive box.

This time, I brushed them into a cardboard nuc box and turned the nuc box on its side in front of the hive, assuming that the queen was in the upside down swarm box. I left it overnight.

The next morning all the bees were clumped in the inside corner of the cardboard nuc box. OK, your highness, I thought. My hive box isn't good enough for you...and you and your retinue are in the cardboard nuc so I'll just add frames and let you settle in there. 

So I did just that - put five frames into the nuc box and put the top on it. I opened the entry and set it on top of the hive box I wanted them to live in and left them overnight. 


I could see bees flying in and out of the entry - some went down into the hive box and some into the nuc box. I covered what had been covered with a hive drape with the inner cover. I thought, maybe now I've convinced the queen that this is a good place.

But this morning there was a swirling of bees. Not huge because she is not leading a huge swarm - just about 1 1/2 cups of bees - but she persisted nevertheless and the tiny group was taking off.


I waved "Bye" and wished her well. I hope they find a home they like better than my apiary.

PS, for a tiny in-joke, as I posted this, Blogger noted that this is my 1300th post and it's funny to me that having kept up this blog for twelve years, the 1300th post is titled "Nevertheless, she persisted!"


Friday, April 28, 2017

Listed as an "Awesome Sustainable Garden Blog!"

Today I was notified that I was on the list of blogs noted by a British site called "WhatShed" which is a British gardening site. The list is long and I am third on the list. I thought you might want to see the list to find gardening blogs that might be of interest to you as well.

One I really liked was You Grow Girl from Canada which has beautiful photos and guides to planting. She has a post about the bumblebee. I also liked Mr. Brown Thumb whose writing seems to apply to my own gardening struggles.

I'm honored that my blog was included - it was apparently based on a poll of readers of the WhatShed site.


Thursday, April 27, 2017

Swift Swarm Catching

At the community garden, our bees in one hive didn't make it. They actually dwindled and died before winter. I neglected them with my injured shoulder and they were a swarm that I installed last summer.

They probably came from a yard where the bees were treated and I don't treat my bees, so these bees may have not been able to survive without treatment. In addition, you never know about swarms. Since they didn't come from my bee yard, I can't rely on their genetics. Often swarms don't make it.

But that meant that I was one hive short at the community garden where like in all of my bee yards, I want to have two hives so one can serve as a resource if the other needs it.

So I was DELIGHTED when I got a swarm call from my bee club's swarm list. The swarm was in the yard of a beekeeper who did not have the equipment to keep them. They were described as being six feet off the ground and easy to get.

Now, the call came in at 2:15. The bees were 25 minutes from my house. I had to drive there, get the swarm, drive back to the community garden (25 minutes), install the bees, and get myself to a 4:15 doctor's appointment that is also 25 minutes away (more with the current state of Atlanta traffic due to the I-85 collapse). I had at least 1 1/2 hours of driving with little time to spare to collect the swarm or to install the swarm.

Everything had to run smoothly.

I arrived to find that the swarm was indeed just about six feet up or so.


I had brought my swarm catcher. Here's a photo of it from an earlier swarm catch in 2016.


For this swarm, described as six feet up, I didn't bring the painter's pole in the photo above, but rather brought a mop stick to screw into the swarm catcher. I didn't even use it - instead, I used the swarm catcher on its own. 

I spread the sheet I had brought under the swarm as quickly as possible. I took the swarm catcher and while the man whose bees these were bent the tree branch down, I jerked up on the swarm catcher and the bees fell into it. One more jab at the tree and I had the bees in the box I had brought.


Here you can see the bees in the box under the ventilated hive cover, the swarm catcher to the right, the bottle of sugar syrup which I had used to spray the swarm, my bee brush, and the yellow bungee cord set to secure the ventilated cover to the plastic box. The bees on the upper edge of the box are sending out Nasonov, letting me know that I have the queen.

The whole thing took ten minutes. There were many bees on the outside of the box, but I didn't have time to wait for them to find Mama. I wrapped the box, bees on the outside and all, in the sheet and raced for my car.

I drove the 25 minutes to the community garden. By the time I got there, at least 100 bees were gathered on my back window. I jumped out of the car, put on my veil and jacket, grabbed the bees and my bee brush and carried all of it up the hill to the hive. When I arrived, I could not pry the top off of the box!

I went in my veil to the car where there was no hive tool. What had I done? Cleaned out the car and moved the resident hive tool? ARGHHH. Leaving the bees, I jumped into the car and drove in my veil to my house about two blocks away. I ran into the house in my veil and down the stairs to the basement. As I headed for my bee kit to get the hive tool, I tripped over a box in my way that I couldn't see for the veil and landed smack on my hands and knees on the concrete floor. 

Note to self: Next time, take off the veil before going inside.

Hive tool in hand, I raced back to the garden, opened the hive and dumped in the bees. I grabbed the hive top, put it on solidly, and ran to the car. I got to the 4:15 appointment at 4:13 (with many bees still in the car). 

I didn't have a long doctor's appointment, but right after it I had to go babysit grandkids, so I hadn't been back in my neighborhood since I installed the swarm about 3:30. I was leaving town the next morning, so I stopped by the hive that evening just after dark around 9 PM. I could see bees on the entrance and felt good about it.

I came back to town on Monday and stopped by the other day to check on the hive. While there are bees flying in and out, the numbers don't compare to the overwintered hive which is booming (I know, I know, the robber screen is off and needs restapling. I'll do it when I'm over there on Sunday).


This was done in such haste and today I stopped back by to see how they had survived today's rain and horrors! I noticed that the hive is barely supported on one side. That's something to fix this weekend as well!


Don't know how it is barely on the corner of the cinder block, but that obviously will not do and both hives need entrance reducers.


Monday, April 17, 2017

Package Bees are not Loyal to Their Queen

When the package bees woke up that morning, they didn't know they were going to be shaken into a package with a bunch of strange bees, often not their sisters. Then they were hanging around in a screened cage complete with a syrup can and a queen (not THEIR mother) in a cage. Loyalty to a stranger has to be earned.

So when the beekeeper picks up a package, it's not a bonded group. It's a loosely connected bunch of unrelated bees with an unrelated and heretofore unknown queen.

I took two packages to Stonehurst Place to install the bees on March 29. The packages were about equal in size:


As in the typical package installation, I sprayed both packages with sugar water and then installed them. The hives are side by side facing a privacy fence so that in flying out, the bees have to fly up and over the fence.

Here's the first hive that I installed:


You can see at the front of the box the tape on the top of the queen cage which I jammed between two frames. Although you can see the syrup can sitting on top of the frames, after the bees settled in a little, I removed that and put on the inner cover. Then I gave them a feeder of Bee Tea on top of the inner cover hole.

As you may remember, I have been dealing with an injured shoulder (from a fall in October) that is just now getting better. When I finished the first install and turned to the second my shoulder hurt and I didn't have it in me to be quite as thorough. 

I had a terrible time with the staple holding the Hive 2 queen cage to the package and destroyed the tape in the process. I decided to put the queen cage on the floor of the hive under the frames instead of putting it between two frames. 

When I returned three days later to give them more food, there were about three times as many bees in hive 2 than the first hive. 

And today when I went over to see if they needed a new box, here's how the bees looked in hive 1:


They are in the hive and working, but not nearly like hive 2:


Hive 2 had bright white wax drawn on every frame. I gave them a new box and pulled up two filled frames as ladders to encourage the use of the new box.  

I think all of this is about lack of loyalty and strength of pheromones. The bees were looking for a place to go and probably the pheromone of the queen in hive 2 was stronger than the queen in hive 1. And with queen 2 on the bottom of the hive, it was probably easier to smell her pheromone than the queen in hive 1 who was wedged between the frames.

So the bees who had no loyalty to begin with, gravitated to the queen in hive 2 - whether because of her strong pheromone or advantageous cage placement.

How I will handle this, in the long run, is that the next time I am over at Stonehurst Place, I'll move a frame of brood and eggs from Hive 2 to Hive 1.  If I do that every time, gradually I'll help build the population of Hive 1.


Pin this post

LinkWithin

Related Posts Plugin for WordPress, Blogger...